Creating a mosaic is easy—just choose your Big Picture and add your Small Pictures. But if you want to transform your mosaic into a true work of art, a bit of expertise goes a long way. This guide will take you through five essential steps to elevate your mosaic from ordinary to extraordinary.
Your big picture should be simple, bright, and colorful. While the picture you cherish the most is the ideal choice, there are ways to enhance it further. Simple adjustments—like cropping or increasing brightness, exposure, contrast, and saturation—can dramatically improve the overall appearance of your mosaic. These small tweaks can have a significant impact, making this the easiest and most effective step to elevate your mosaic.
While the big picture might draw people in initially, it's the small pictures that bring the mosaic to life. These images hold the memories and emotions that make your mosaic a joy to revisit time and again. Every glance at the small pictures is a reminder of cherished moments. While the big picture is a striking centerpiece, the small pictures are what you'll treasure most.
Many underestimate the importance of these small pictures and often ask, "What’s the minimum number of photos needed?" Our answer: "As many as possible." Instead of striving for the bare minimum, embrace the abundance of memories stored on your devices. After all, a photo mosaic lets you display thousands of memories in a single, stunning image.
However, quality matters more than quantity. Focus on meaningful photos rather than random snapshots—like the faces of loved ones instead of that random meal you had. If the mosaic isn't for you or you’re not the primary photographer, consider collaborating with others to gather photos. This collaboration will add even more significance to the final mosaic.
With your big picture and small pictures in place, it's time to refine your mosaic’s details. Some people prefer the big picture to be prominent, while others value the clarity of the small pictures. Striking the right balance is key, and we’ve provided controls to help you find your perfect setting.
A good starting point is a 40% colorization setting, where the big picture subtly overlays the small pictures. You can adjust this to emphasize either the big picture or the small images, but avoid going above 60% to maintain clarity.
Setting the mosaic’s dimensions is a bit more complex. The dimensions determine how many tiles there are horizontally and vertically. Higher dimensions mean more photos and a clearer mosaic, but they also require a larger print size to ensure each small picture is visible. For example, if you’re printing a 10x10 inch mosaic with 100x100 tiles, the small pictures will be just 0.1x0.1 inches, rendering them nearly impossible to see. Aim for at least 0.5x0.5 inches per photo to ensure they’re noticeable and impactful.
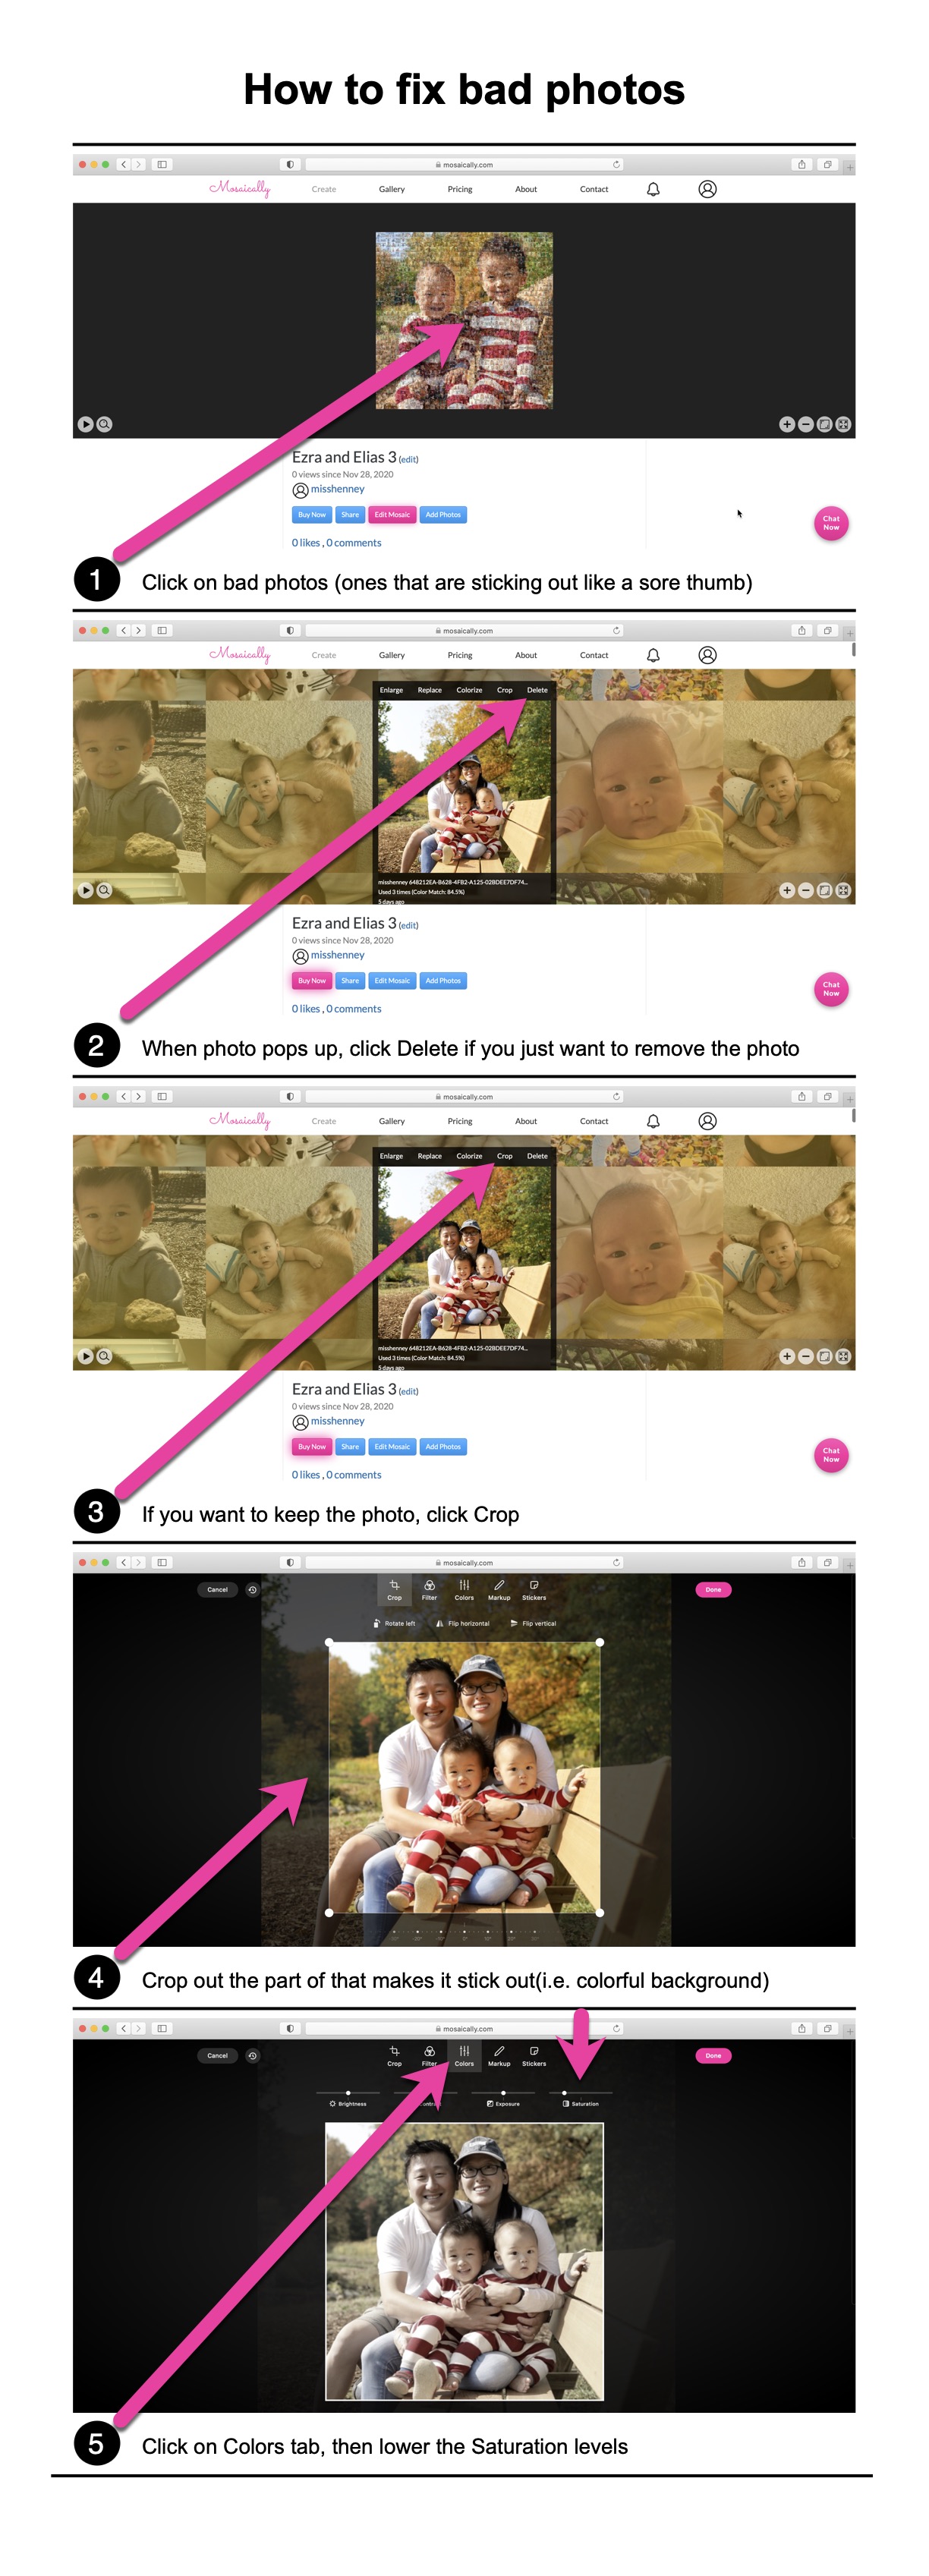
"Bad" photos are those that clash with the overall aesthetic of your mosaic. For instance, if your big picture is predominantly neutral and you have a small picture that’s bright red, it will stand out unpleasantly—like a blemish on the face. Removing or adjusting these photos can greatly enhance your mosaic’s harmony.
Consider desaturating any photos that clash with the big picture. Desaturating means reducing the colors, potentially converting the photo to black and white. You don’t need to go all the way, but reducing the color intensity can prevent certain photos from sticking out too much.
After you’ve fine-tuned your mosaic, don’t hesitate to ask for help. While you may feel satisfied with your work, there could still be room for improvement. We’ve been perfecting mosaics for years and can offer expert advice to make your creation even better. Simply click "Chat Now" at the bottom right corner of our site, and we’ll review your mosaic for potential enhancements.


